| |
| Information |
| |
 |
| |
This Web Site
|
| The main reason for this web site (apart from just being fun),
is to record my house building adventure. It also acts as a sort
of building Blog and diary.
I was hoping that it would be a good reference to other owner builders,
as I could not find any accurate record of the cost of
building anywhere on the
net or otherwise.
As mentioned before, this site is not a 'How to
build' site ... I wouldn't wish that on anyone!. Rather, it's more
of a blog, documenting
how I did
it, with some notes on how I would have rather
done it. It records
some of my pitfalls and also the things that have worked out right.
I also thought it would be pretty cool to have somewhere to post
pictures of friends working here, so when they get back to work
on Monday,
they can get easy access to see themselves and show off
at work.
Another thing I want to develop, is feature pages for all the Owner
Builders I know up here in the mountains. This is mainly for my
own inspiration and to inspire others. So if you're an owner builder
that I don't know... Please contact me!
Until I started putting this site together, I had had no experience
in web design whatsoever. I didn't even know what a 'Dreamweaver'
was! So a big thanks to Cindi for teaching me some basic HTML & Photoshop
skills, and continuing with the technical support. And also a big
thanks to Andry for getting me started with some basic PHP skills.
I'm pretty happy with the result.
|
| |
| |
|
|
|
|
| The Project |
|
|
|
Well I guess my adventure started when I decided having a
unit in Sutherland and a morgadge just wasn't all that
fun.
So
my intention is to sell my unit
in Sutherland & use the cash to pay off my bank loans & have
a cool $100 grand left over to build my house.
I don't know wether that will be enough to finish a house,
as I have never done
this sort of thing before… But
hopefully
with
some
good
luck,
a
lot
of hard work & some help from friends, I will be able to get the place up
to lock up.
|
|
|
| |
I am not by any means saying that having
a mortgade is the wrong way to go. It is probably the easyest
path for most people.
But it is good to be aware that there are other ways of doing things, that
we aren't as a socioty taught (widely advertised)
Ownerbuilding is alot of hard work and incredably stressfull, but on the other
hand it ois incredably rewarding.
|
| |
| The vast amount of inexperience your average person (me) has, will
effect every aspect of building. Some times in a negative way: Like
not knowing the many short cuts, or not knowing about the existance
of some cheap building product. Or not being able to tell good advice
from bad. |
|
<
Good Ideas >
< Bad ideas >
|
|
The
same inexperience can also shape the originality of your home
in unexpected ways. Not having building experience means not
thinking in the same box as others with more experience.
Speaking personaly, my inexperience allowed me to choose paths which I would
not have chosen if I had have known the complications I was heading for. But
that
same path lead me to some amazing features that I havent seen in other houses.
|
|
| |
| So check out my Good idea and Bad idea pages. |
| |
|
Description of building:
My house has a 10m x 10m Ground floor, which will comprise the Kitchen,
dinning & lounge areas. A combined bathroom & toilet plus
one bedroom.
Sitting on this is a 45 degree pitched roof,
which I will squeeze three bedrooms in. Or at least 2 good-sized
bedrooms & a study/library area.
I'm also leaving a spot for a possible extra toilet upstairs.
Click <here> for my house plans.
The house is going to be built on a slab.
The main reason for this is, because its my first house, I just
like having the confidence of working of something flat & square.
The first ground floor is going to be load
bearing mud bricks, with the upstairs area will be timber framing
and clad in corrugated
iron and Hardi-plank.
Update: Well the bottom floor was going
to be load bearing... Refer to <Bad
Ideas>!
|
| |
| |
| Materials: |
|
|
|
| |
|
|
| |
|
Bricks: |
| |
|
I've made my bricks 300mm x 200mm x
150mm…. Already I think this may have been a mistake, as
they're bloody heavy. Laying them is definitely going to build
my muscles up.
Due to the shit nature of Blue Mountains soil, it is necessary
to add some cement to the mix.
Refer <Bad Ideas> for
more information.
|
|
|
Timber: |
| |
|
| |
External: |
| |
| Due to bush fire regulations
all external timber has to be hardwood. |
These are the species
I am allowed
: |
BlackButt
Kwila (Merbau)
Red iron bark
River red gum
Silvertop ash
Spotted gum
Turpentine |
|
|
|
| |
Internal structural: |
| |
All internal timber I am using,
will be pine I have milled myself (Well my mate Scott
Spring milled it, & I helped :). This will be
used for all my major beams & rafters & probably
a lot of my internal studs as well.
Refer to <Bad Ideas> for more information
on the cost effectiveness of milling. |
|
|
| |
Stud walls: |
| |
All my internal stud walls are made completely from
re-used timber, scavenged and de-nailed.
It is so worth using recycled timber for stud walls, as at $5 per meter
from the hardware store, even paying someone to de-nail (like
I did), the cost saving is huge. It's quite easy to clean 100m of timber in an
hour. |
|
| |
 |
|
|
| |
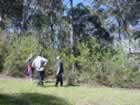
This is one mornings trawl of all the local sources |
|
De-nailed and stacked in there corresponding
widths: 90mm, 70mm etc.. |
|
|
|
| |
Architraves / cornices /
skirting |
| |
I have started collecting. Every time I see a length,
I pick it up. It dosn't matter if there is only one length,
because as the piles get bigger I have found that I have
collected enough
of
one
particular
profile
to do
a room.
I now have enough for my whole house. |
| |
|
| |
Cupboards and shelves: --
to come |
| |
|
|
|
|
Windows: |
| |
|
Once again, fire regulations have dictated
what I can or cannot use. Council has only given me a few options
here, and I'm still trying to sort out what I can do.
1) Toughened Glass - Looks the best out of the three options,
but toughened glass is expensive. I've been collecting waste
unused toughened glass from building sites… But I need a
lot more!
2) Mesh glass - A LOT cheaper, but would feel like you're living
in a cage.
3) Glass with shutters - Cheaper than toughened glass, but a
lot of extra work. And is unsuitable for bigger windows.
|
|
|
Fixtures: |
| |
|
So far I haven't bought
one single power point, switch or light fitting. These have
been collected from factories & houses that are about to
be demolished. Demolition companies do not remove most fixtures,
as it's not worth their while. Ask & you shall receive.
(Or failing that... Seek after dark with a screwdriver, &
you shall receive)
|
|
|
Fixings: |
| |
|
I've been pretty lucky with fixings………. |
|
| |
| |
| <back to top> |
| |
|
|
| |
| The true cost of building my house |
| |
As mentioned above, when I was researching building a house, I
could not find anywhere a cost breakdown of builing a house. There
where plenty of estimates. For example: $20k up to slab or $10k for
framiming. But that dosn't tell you too much: What % was the timber?
How much for fixings?. If I was a carpenter how much would I knock
of the cost doing it myself?
For this reason,
I am going to keep a comprehensive list
of every cost I incur building my house.
This tally will be as accurate as possible, including every cost no
mater how small. It will also including a running tally of labour
& swaps.
Also recorded is the total number of days I have worked on my house
(instead of earning money).
This list will be for an unskilled person doing most of the work
himself. So at least other owner builders will have a good refference
to start with. Hopefully
When added, it will give a very accurate, real cost, of building
my house using alternative methods.. |
| |
| <Full list of expenses> |
| |
|
| |
Living in a shed
Some thoughts on sheds:
# There's something very 'Australian' about sheds.
# A shed just isn't a shed until it has shelves.
# A shed MUST have at least one tool hanging from a nail,
 before it
can be called a shed. before it
can be called a shed.
# Every bloke needs one. |
 |
|
| |
|
I had decided to live on my block for the duration of the project
to save on money.
I had decided this pretty early on in the piece, so I had had a
while to collect materials. It was also pretty convenient as I had
a whole lot of materials which I was going to use for my house,
but due to bush fire considerations, were no longer suitable.
Seeing that it looks like I'm gunna be here
for a while, I aimed to make the shack as comfortable as possible.
I also decided to face the shack away from the building site, so
I wouldn't have to look at it on weekends... I thought this would
be more relaxing in the long run!
Check out my Shack
Building page.
|
| |
| |
|
Scott's easy shed building technique:
<Link to picture>
|
| |
| 1) |
Start collecting scraps… No need
to pay for a shed! |
| |
The cost of the shed should be close to zero. (Although having
a van helps :)
| Materials needed: |
Bricks or besser blocks for footings |
| |
Hardwood brick palettes for floor |
| |
Scrap wood for framing (It's good to have continuous
sections for the top & btm plate. |
| |
Scrap cladding - Corrugated iron is usually free. |
|
| 2) |
Level off some ground for the brick
footings. The tops of the bricks must be level. |
| |
Space them at a grid of 1.2m, this will
allow brick palettes to be dropped onto them.
Luckily for me, the rock content of Blue Mountains soil eliminates
the need of any concrete! |
| 3) |
Lay hardwood brick pallets on the bricks. |
| |
There you go… In less than a couple
of hours you've got a nice level floor! |
| 4) |
Make a stud wall for one of the longer
walls. Use the shed floor as a guide... This negates the need
for most measuring. |
| |
Then screw tin to the stud wall while
its still laying on the pallets. |
| 5) |
Make another wall, using the wall under,
as a guide. |
| 6) |
Flip walls up & brace. |
| 7) |
Fit two shorter walls & roof |
| 8) |
Two people should have a 4-pallet x
2-pallet shed up in an easy weekend. |
| |
|
|
| <back to top> |
|
|
|
The Council
|
|
Some helpful links:
|
| |
|
|
| |
| <back to top> |
|